Showing posts with label tutorials. Show all posts

26.7.16

Water Squirters Update - Electric Pumps and Valves!


Here is an update on the water guns that I featured here previously. For this year's songkran (Thai water throwing festival) I modified one from last year and created some more water guns. 
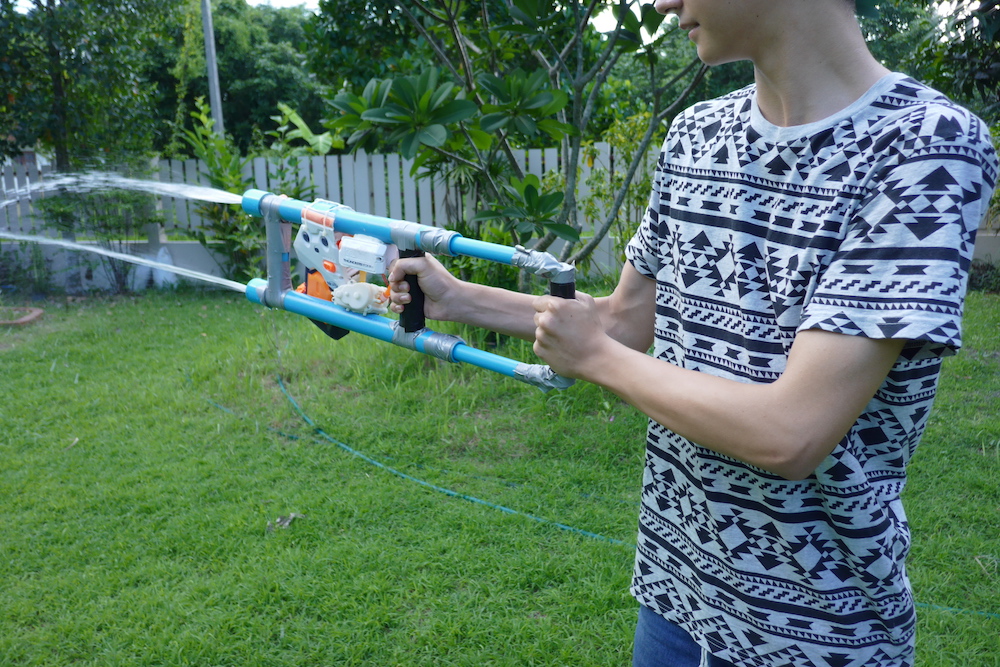
This first gun is the double barrel squirter that I made last year with the integration of a Nerf Thunderstorm Super Soaker. As the Thunderstorm only produces a small stream, it is not a good primary weapon for any water fight. It is however very useful when combined with the double barrel pipe squirter as it can fire a constant stream from an interchangeable water clip. As it is battery operated and I own two of these Nerf clips, it is very easy to use. 
I made it by unscrewing the pump and nozzle of the Thunderstorm and sawing off the watertight battery pack and integrated button as well as the middle section of the gun, which included the parts where the water clip attaches. These parts (along with some extra tubing) were then all secured to the old squirter with a combination of hot glue, epoxy putty, zip ties and araldite. 
These two water guns work perfectly together, especially when the Super Soaker part is filled with iced water to make up for the low power and amount of water (this is commonplace in Thailand during this festival). It is also fully waterproof, even when forgotten at the bottom of a pool for over half an hour. When the plunger tube is pulled out partially, it can also act as a stock when using the motorised  part.

The second water gun is a variation of the original single barreled version. The difference is that it utilises two valves to suck water through a tube can either be screwed onto a bottle or placed into one of the many plastic tubs or drums that line the street during this time. Like the above squirter, this is an upgrade from the original version as it can be used while on the move if the bottle is put into a small backpack. 
It was made with two valves taken from a small, cheap water gun that was near useless. The end of the nozzle valve was cut off and filed/sanded to make a bigger hole. Another piece from the small water gun was also used to attach the hose and a weight was attached to the other end of the hose to keep it submerged while sucking out of a bucket or tub. 

The water gun in action

GoPro Hand Grip


This GoPro hand grip/monopod was created with a 3D printed connection that was hot water molded around a piece of PVC pipe and screwed onto it.

As the printed connection was not extremely strong, a cord was fastened through a hole in the pipe, in case it snapped. This was useful as the connection on the first prototype was much thinner and less sturdy and snapped when being tested in the surf.

The cord is then fastened under the clip at the top of the camera which does not interfere with the seal in any way.


Image taken with the GoPro in initial testing conditions


12.6.16

QU-BD 3D Printer


The following video is a timelapse of the assembly, modifications and first print with a QU-BD Two-Up (Version 1) 3D printer. Lots of extra time was spent off-camera filing and sanding down parts to actually get them to fit. This was a badly made kit and the instructions had not been updated for my version of the printer. The x-gantry also sagged too much to print anything and a pulley system had to be added to the printer. Hopefully these problems have been addressed in the Version 2 redesign of the Two-Up printer. Overall, I would not recommend this 3D printer, especially since now it is possible to get much better printers for the same price or less, although at the time, this was one of the best printers for such a cheap price.


Note that this [the print shown in the video] is my first ever successful print and was done using incorrect print settings, resulting in the bad quality print. Below are a few photos of the test object that I first printed next to the same object printed more recently, with better settings. Unfortunately, during the printing of the newer black one, the printer glitched and resulted in the first few layers being not in line with the rest of the print.


12.1.16

Dynamo Bike Light

A rear LED bike light that is powered directly from a dynamo on the back wheel. It was created as a product design project where the aim was to create a sustainable lighting solution.

All materials (excluding hot glue and solder) used to create it were recycled or reused. Many of the electronic elements came from either broken appliances or a R/C car, the metal brackets holding the dynamo in place were created from a tin can, and the plastic shell of the light was the packaging for some epoxy putty.

Here are some screenshots of the design process:


The finished light and dynamo fits on as shown in the images above. It functions very well and gets even brighter when going fast, although still glows enough to be seen when traveling slowly.


29.9.15

PVC Pipe Standing Desk

I made a standing desk for a laptop computer that sits on a standard height table. As I spend most of my day sitting down, often on a computer, I decided to make this so that at least when I am at home I can have better posture when using my computer.


This video shows the process of making a standing desk out of PVC pipe.

23.6.15

Lego Balisong Knives

Here are two Lego balisong knives, both of my own original design, one of which is double bladed. Theoretically, the double bladed design should work (not slice up the user's hands/arms) if one side of the blades were sharpened. The single bladed knife combines with an extra part to make the double bladed version. As can be seen in the video, although the knives are much lighter than a metal equivalent, they can still be used to do some tricks.

24.4.15

Water Squirters for Songkran 2015

Here is a video of two water squirters that I made with PVC pipe. I was originally going to make two, but then decided that a double barrel one would be so much cooler. It is made with only the parts that I had left over from the first (I had two of everything) and this is why the handle is done with a T piece cut in half instead of two L shaped connectors and the pipe connecting the two barrels is only glued on with some tape for support. The extra black duct tape on the two handle parts is just for comfort.

4.4.15

Inspired by a Flag...

Here is a load of minifigs that were inspired by two Megabloks pirate flags. (from sets that I got when I was a little kid and thought everything was Lego) I thought that since I had them, I might as well use them and soon built a sort of Warhammer 40K inspired standard. (below) I then made a few sci-fi minifigs featuring armour with the same insignia.
(I made/photographed these guys a long time ago and only just got round to putting them up)


* click on the photos to enlarge them


These were fun to make and here are some stand out techniques that I used
  • Some details sculpted out of milliput or a low temp thermoplastic- for the kneepads and holster of the first and last figs
  • Warhammer bits- jetpack/backpack and blade of the second fig
  •  Third party accessories- brickforge and brickarms weapons
  • The skull and crossbones symbol on some of the armour has just been printed out in black and white on normal paper and stuck on. I then painted around the edges of the patch to make the black printing blend into the dark blue armour. This is actually quite durable even without the layer of clear sealant
  • The second last minifig also has robot legs, done with a normal minifig hip piece with some tubing pushed onto the pegs.


and a .gif cycling through some more shots


10.5.14

Electric Diddley Bow

This is a diddley bow, or a single stringed guitar.


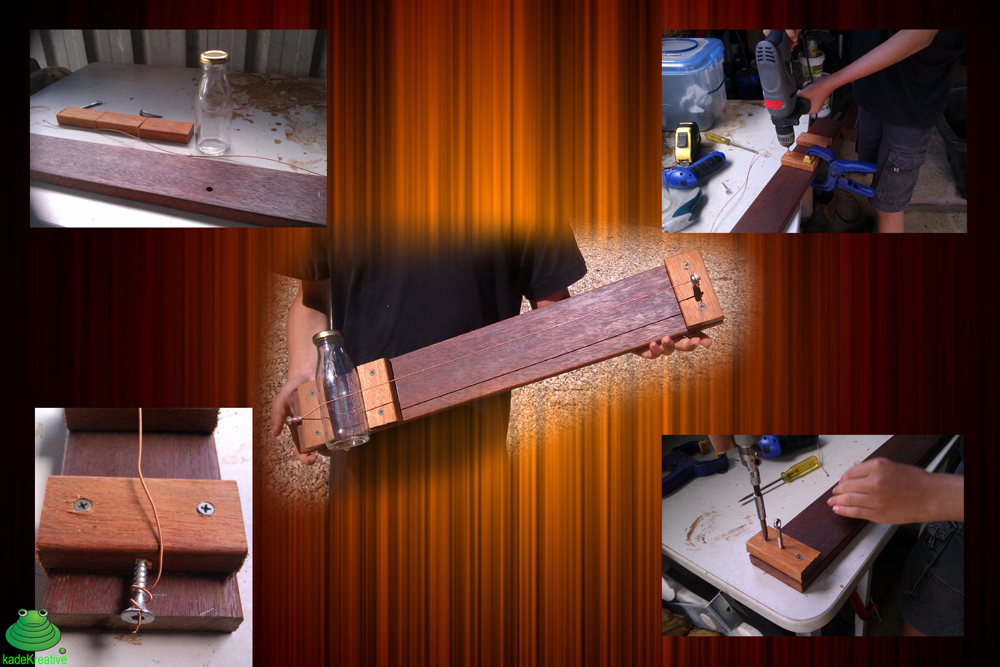
It is made using an old milk bottle, guitar string, bits of wood, a washer and some screws. all of these pieces are just random bits left over from various things. I put these things together and out popped a diddley bow.
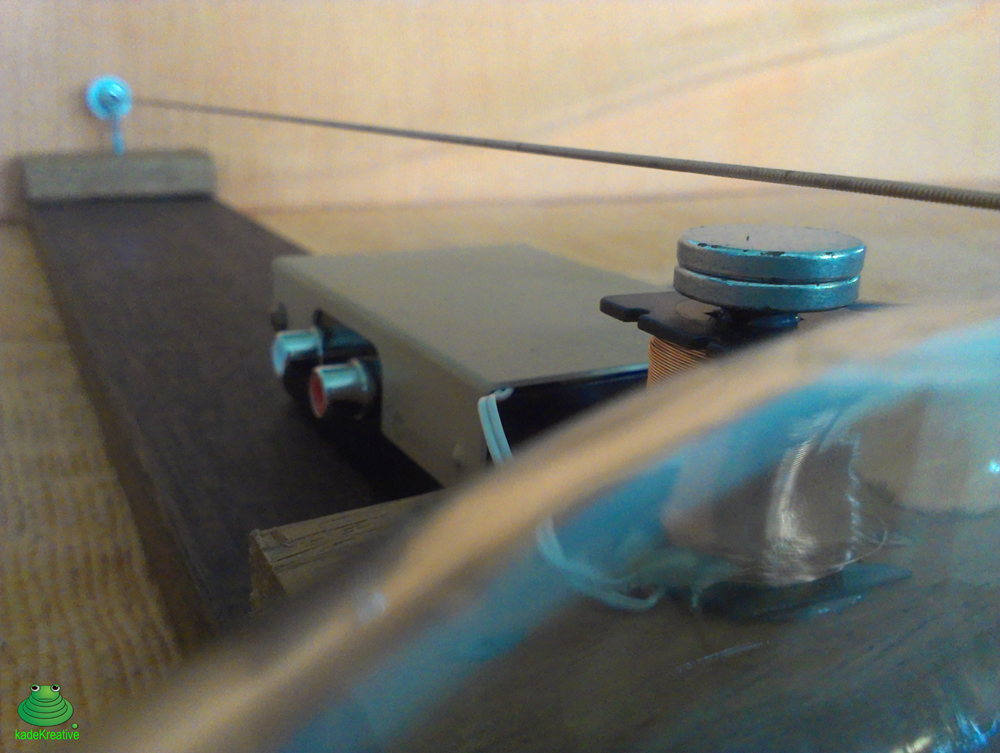
The next step was to make the pickup. I used a coil of copper wire from an old remote controlled car with a screw through the middle and a magnet stuck on top. This was then wired into a socket and was ready to go. Although this is very simple, the pickup works extremely well and the sound is completely clear. This worked well through the speakers but didn't work well with some guitar effects software that I downloaded to my computer. this was because the the computer could hardly pick up the weak signal. I fixed this by replacing the plug socket with a preamp. The pickup was wired directly into the left input and right output. So if you plug it into the red socket it is raw and if you plug it into the white socket it goes through the preamp.

Some features of the diddley bow are the tuning screw that can be  tightened with an allen key, one of the screws painted red to show which way is on, a small red dot on the switch that can be seen when it is on, and the plug that has been painted.
The diddley bow looks slightly like it has come from the world of steampunk.


This is a video of me playing it! In the video, when I plug it into the computer, it is going through the guitar effects software.


29.9.13

Clones!

Here are some custom lego clones that I made. They aren't based on any particular clones although one of them is meant to be an airborne. Two of them were made using a basic clone wars clone and the third is the same, only with a modified snowtrooper helmet. They are all hand painted and don't have decals.


The kama and pauldrons (leg and shoulder armour)
were made with paper while everything else was painted on.


This one is based on an airborne trooper but has different markings.
The helmet is a standard clone wars helmet that has been modified by filing and sanding off the fin on the top and also part of the front.
As I didn't have a lego bag, I made myself one out of duct tape. It can also be used to strap his gun to his back.
The visor was added to the snowtrooper helmet/backpack by melting small holes in the sides of it.

13.7.13

Flamethrower Tutorial

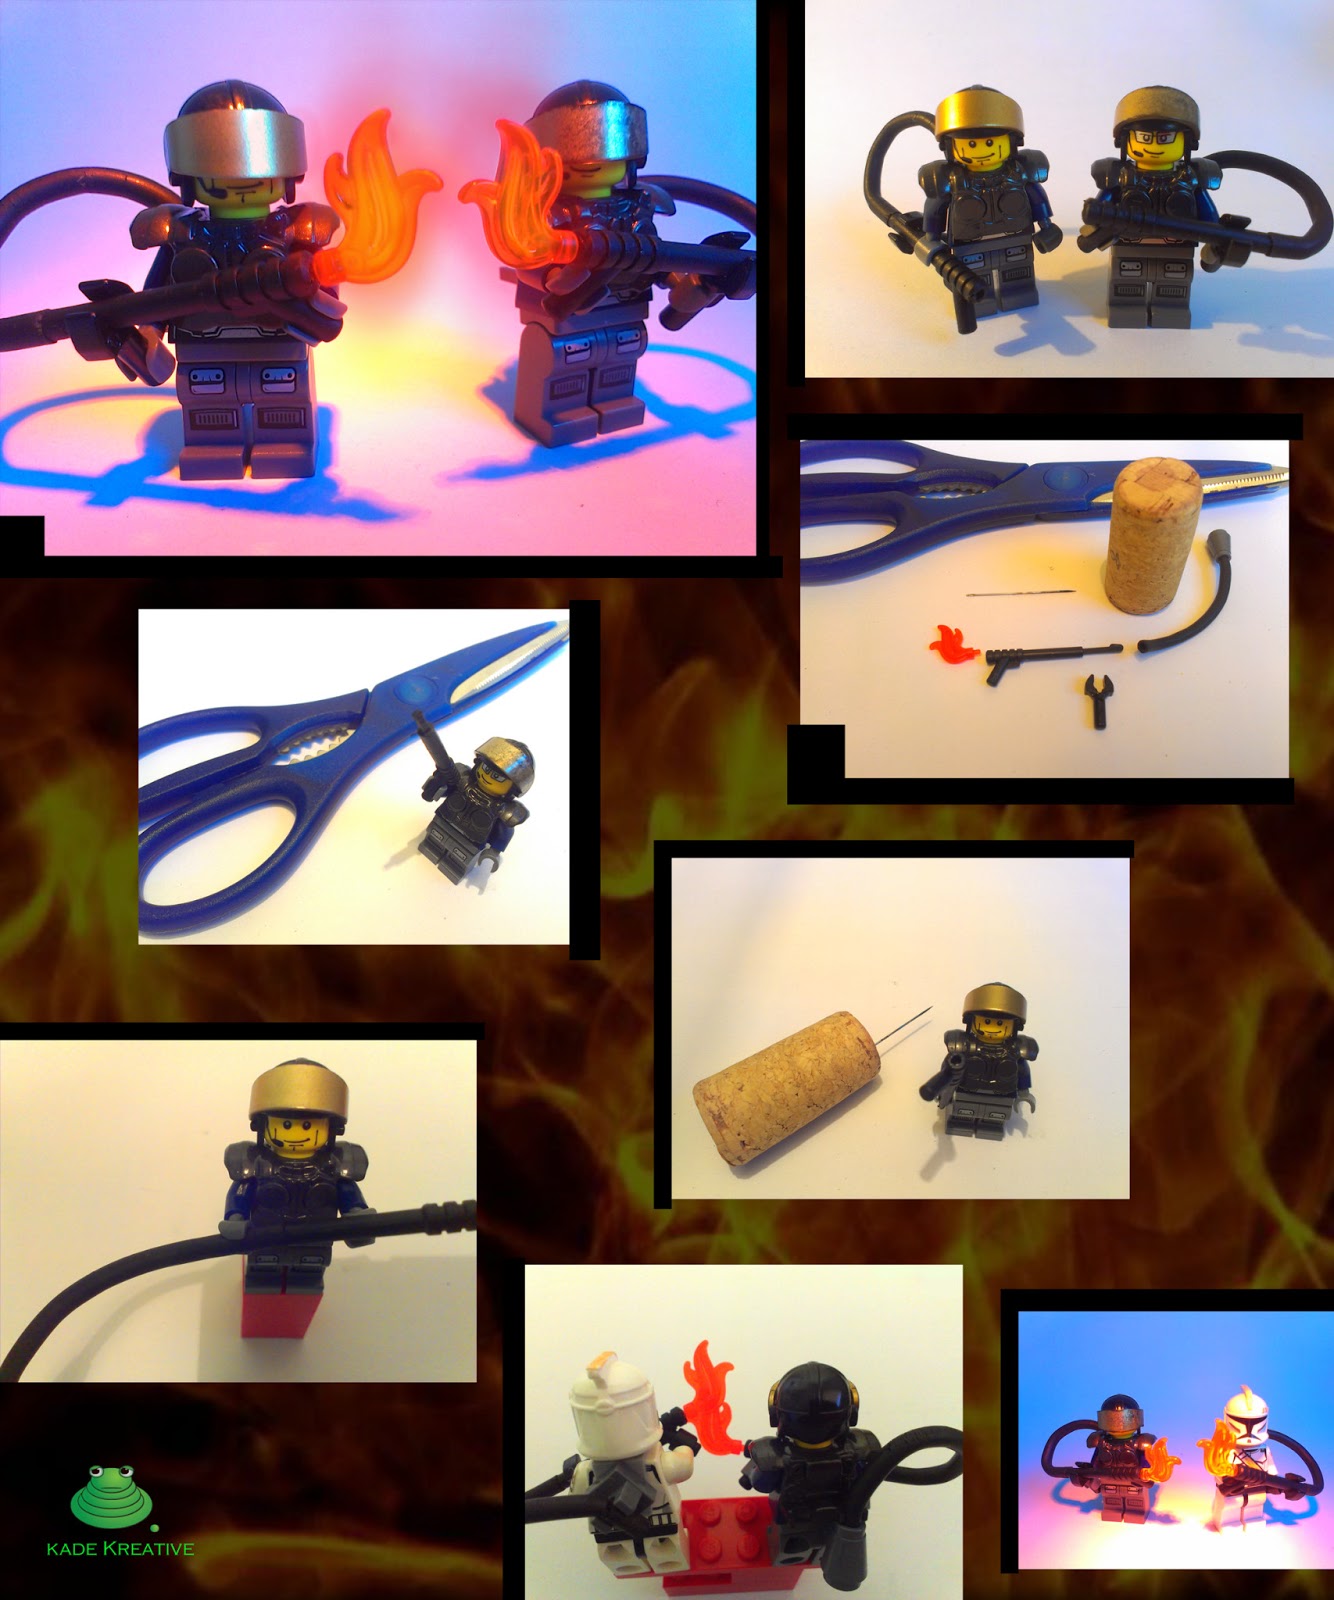
Here is a little tutorial on how to make some custom lego flamethrowers to add to your army just that little bit more AWESOMENESS!


First, get all the bits shown below and cut  the tip of the harpoon off. Next stick the needle into the cork, (otherwise you will burn your fingers off) heat the needle over the stove and melt a hole in the end of the gun just big enough to push the end of the flame piece into it. Then, push the tubing onto the other end of the gun and attach it to the back of the minifig in any way you like.
How To Make Custom Lego Flamethrowers